In today’s post, we explain what you need to consider before soundproofing a rehearsal room, the materials required, and how to do it step by step. Find out more!
Soundproofing a rehearsal room: what should I consider?
It might be useful for you to read two related previous articles:
To summarize, this article focuses on stating that in a room where string instruments, amplified vocals, wind instruments, and percussion are played, it is absolutely necessary to carry out full soundproofing. This means creating a new room within the existing one. This approach is also applicable to machine rooms or workspaces where noise levels or machinery vibrations can be felt in adjacent rooms.
Materials for soundproofing a rehearsal room: step-by-step guide
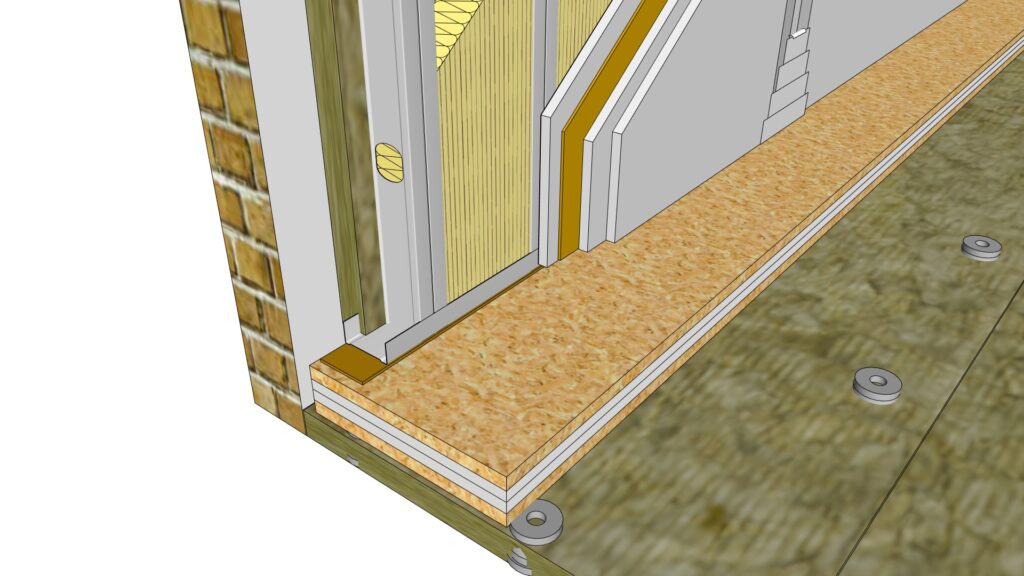
1. Floor shock absorbers: Install the shock absorbers specified by an engineer or qualified technician, who will determine the exact model and position of the floor shock absorbers on top of a layer of mineral wool (see section 3). Then proceed with a concrete screen or a dry structure made up of two 19 mm MDF boards with two 15 mm plasterboard sheets in between. Leave a 3 cm gap between the new floor and all four walls to avoid creating an acoustic bridge that would compromise the entire setup. This type of flooring usually takes up around 11 cm, not including the final finish (such as parquet or vinyl flooring).
Example of a shock absorber setup in a rehearsal room
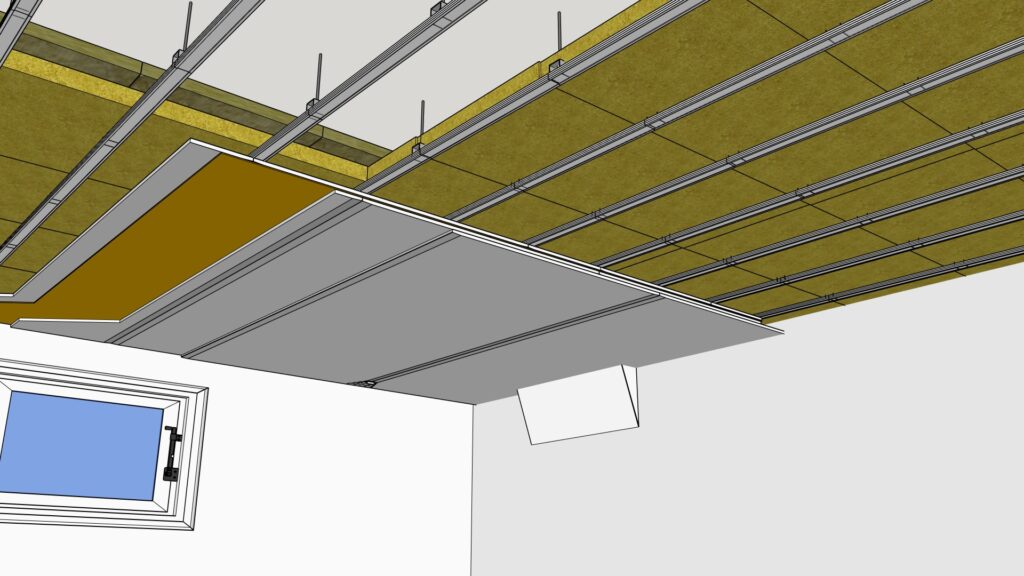
2. Supporting structure for drywall between a floating ceiling and the floor: Use a structure of 50 mm, 70 mm or 90 mm depending on the goal and wall height. Alternatively, you can use wooden battens of 50 x 50 mm or 50 x 70 mm if this material is more economical.
Example of an isolation scheme placed between floating ceiling and floor
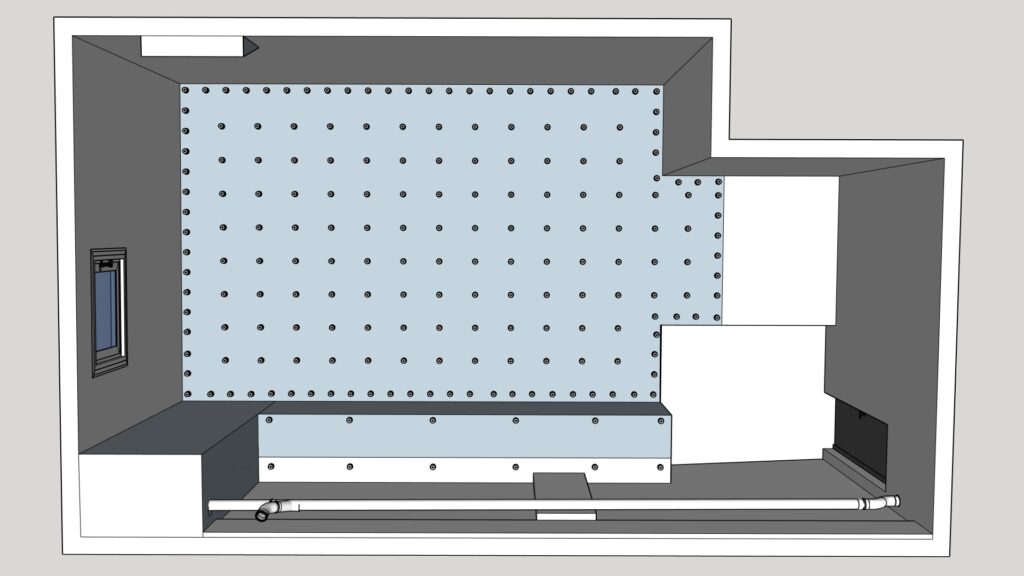
3. Mineral wool 1: Low-density mineral wool (25-35 kg/m³, such as Arena Apta or similar), 4 cm thick, placed in the air chamber between the current wall and the new one.
4. Mineral wool 2: Higher-density mineral wool, around 70 kg/m³, such as Alpharock E225 or similar. If a 70 mm supporting structure is used, install 60 mm mineral wool. If a 50 mm structure is used, use 40 mm mineral wool.
5. Laminated plasterboard: Two or three layers, depending on the objectives. The first layer can be replaced with a denser material (like MDF), but the last layer should always be laminated plasterboard to ensure the joints are perfectly sealed with tape and joint filler. The thicker each layer is, the better the soundproofing. Note: We use three layers of 15 mm Placo PPH, and this configuration reduces the space of each wall by 15 cm.
6. Elastomeric rubber or self-adhesive acoustic barrier: 2.5 mm thick and 5 kg/m² or 5 mm thick and 10 kg/m². Install this material between the supporting structures or wooden battens and the walls, ceiling, or floor. Also, use it between the first layer of laminated plasterboard or MDF and the second layer of laminated plasterboard to enhance the acoustic performance.
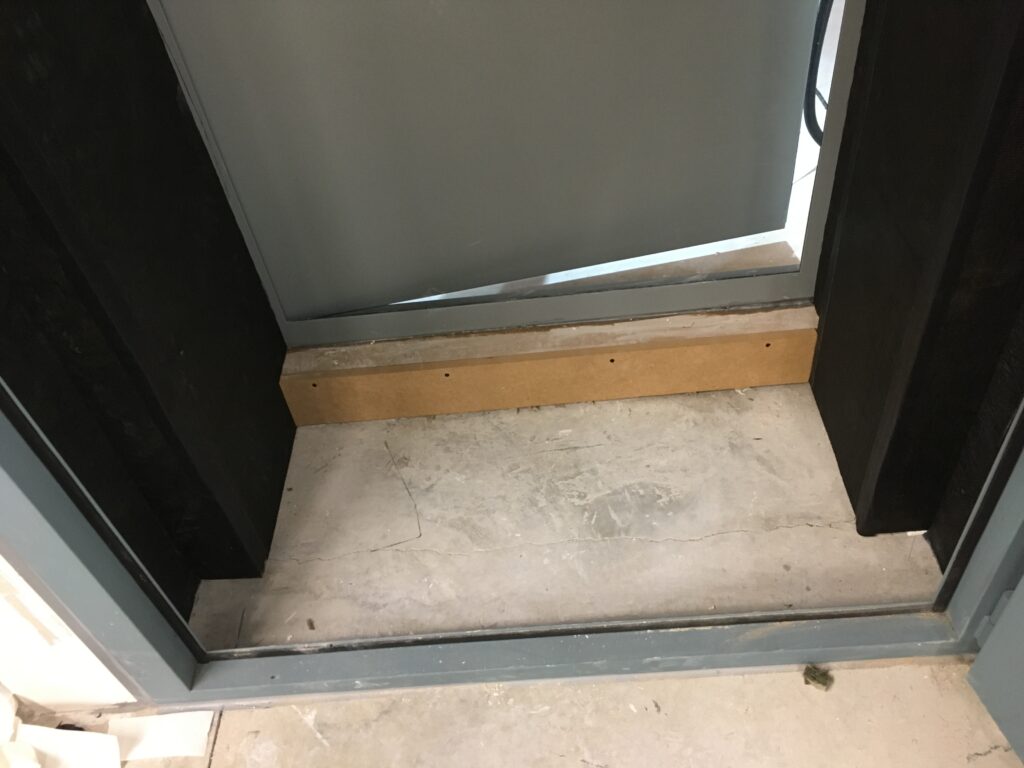
7. Acoustic doors: When undertaking this type of soundproofing, it is essential to use double acoustic doors with ratings between 40 and 54 dB each.
Example of two 47 dB acoustic doors installed at different heights, with a 25 mm layer of Isover Climaver Neto used as an acoustic absorber in the gap between the two doors
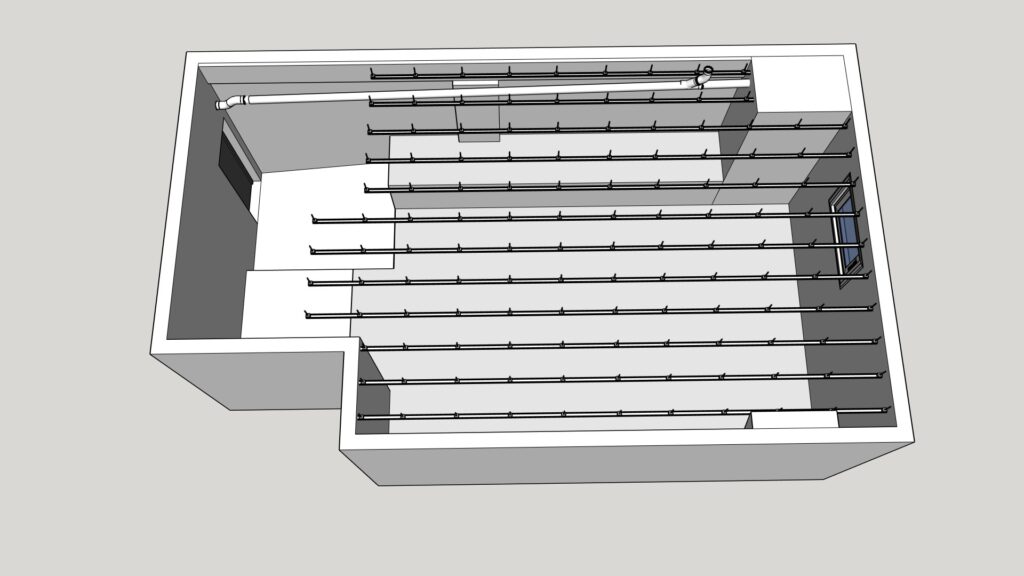
8. Ceiling shock absorbers: Install the shock absorbers specified by an engineer or qualified technician, indicating the exact model and position of the ceiling shock absorbers using metal anchors and threaded rods. Ensure enough space is left to apply, above the metal ceiling structure (TC47), a layer of the two types of mineral wool described above for the walls, followed by two or three layers of plasterboard, as done on the walls, with the elastomeric rubber Flat Barrier placed between the first and second layer. A safety gap of 3 cm will be left between the new ceiling and the four walls to avoid any acoustic bridging that would compromise the entire installation. This ceiling system takes up a minimum of 17 cm in total.
Example of ceiling shock absorbers
Example of an isolation scheme of a floating ceiling
We recommend that you start with a basic isolation measuring that ensures that the project fulfills both your demands and the isolation requirements, which depend on wether your room is located in an industrial zone, semi industrial, residential or somewhere with remarkably demanding noise conditions.
Once you have information on the composition of the ceiling, floor and walls, the most important piece of advice is to do a ceiling and floor structural security check to be sure that the weight that you are going to add to the space can be withstood by the building.
In the case of these kinds of isolation treatments, in previous routines we have to consider the space taken up by the wiring for the switchboard and the pre-installment of an A/C unit as well as the renovation of the air conducts depending on what kind of room we are operating in and wether or not there are interior windows for either private or public use.
If you are in a rural or industrial area and you are sure that no regulations limit you, there is no percussion in the instruments within your rehearsal room and, above all, you do not need to complete the process of obtaining an activity license because it is only for amateur use, you can follow the instructions of the Constructive Acoustics 101 guide.
Hire a qualified technician to carry out the work.
Request our advisory package. We can guide you through the process and address any questions that may arise during your project. Additionally, we can assist in studying the acoustic conditioning of your rehearsal room to achieve optimal reverberation time and improved listening conditions for all musicians.